Monday, March 31, 2014

Project 52 - Miniature Bear Making - #4

Mark the Joints

One of the fiddly parts of miniature bear making is jointing.  We will discuss various jointing methods in a future post.  For now, let's assume that we are going to use split pin joints, and that you have a pattern that has the joint position indicated, as Angus does.
When marking the pattern pieces on to fabric, be sure to transfer the joint marks accurately. 
I use a punch or a large darning needle to make a hole in the template so that I can press a dot with my marking pen in exactly the right spot.  You all knew to do that, right? ;-)
So the groundwork is done, I marked my joints accurately on the wrong side of the fabric, I sew the bear together, turn it, want to start jointing... and the dot is impossible to spot through the opening on the side of that tiny little limb.  Darn! 
Here's a very simple solution.  Before you start sewing the pieces together, grab a needle and thread it with brightly coloured cotton.  Sew a tiny X over the joint position and leave the ends of the thread hanging on the right side of the fabric so that you can pull it out later.  This simple trick saves  lots of aggravation.

This is my book page for lesson 4.
In this miniature bear making series, we are using the Angus pattern, which you will find in my Etsy Shop, and on the Tin Soldiers Website.
I have made a few page templates if you would like to copy mine, but it could also be fun to make your own.  Every week, you will find printable templates for Project 52 HERE .
Yesterday, Aurora visited the studio and brought her book to show.  What an inspiration.  She is a mixed media artist extraordinaire.  All her pages are planned and the backgrounds are filled, just waiting to add each week's lesson in.  There are bits of fascination on every page, I could play with it for an hour... cartoon strips, a page from her grandmother's ID book, cotton strips, images cut from posters and packaging boxes, bits of wool and paper napkins... 
Can't wait to see more of Aurora's pages, I will have to hurry up with the bear making tips.  If you have made a page or two, we would love to share them.  You can send photos to me at megbear99@gmail.com, and I will add them to the blog.

Good Monday Morning Everyone!
I hope you had a relaxed weekend.  We certainly did.  On Saturday we made polymer clay Easter bunnies here at Tin Soldiers and wow, it was inspirational to see the ladies putting their own interpretation on the theme.

Yesterday I was very good, didn't eat a single Easter egg, and I nearly completed three tutorials for Project 52.  Lesson 4 coming up later today, followed by more this week.

On Saturday 5 April we have the first Panda workshop here in the studio.  I'm starting to panic, she still doesn't have a name!  Anyone want to help me out with that?
There will be another panda workshop on 3 May.  Patterns and kits for the project will be available if you can't attend a workshop.  I'm busy putting finishing touches to my panda, you will see the result in a few days.

Wishing you a super creative week.

Wednesday, March 26, 2014

Easter Bunny Polymer Clay Workshop

Been playing with clay this evening. Here's a sneak peek at my very simple bunny for the polymer clay workshop this coming weekend. He needs to be baked, and have some colour added, but right now it's beddy-bye time for the big bunny. Sleep tight, dear friends.

From a blog post a week ago, in case you missed it:

Here's a quick note to let you know that the proposed Easter Bunny Polymer Clay Workshop on 29 March has been confirmed.

Here are the bare bones details:
What:  A polymer clay Easter bunny.  Jointed or unjointed, your choice.  Easter eggs from clay if you want to.
When: Saturday 29 March.  Morning 9am to 12, OR afternoon 1 to 4pm.
How: Adults, beginners to advanced.  Sorry, no children.
Cost: R 60 per session, no clay included.  Bring your own clay, buy clay at the studio, or ask Megan to prepare a clay kit for you, additional cost R 100.  There are no workshop notes, you are welcome to make notes in class, and photograph the steps of the project as we go along.
The class will be limited to 8 persons.  There is a morning and and afternoon session, but you need to book as soon as possible to ensure your place. If you want to stay all day, book for both sessions and pack your own lunch.  Teatime treats served all day.

Tuesday, March 25, 2014

Project 52 Miniature Bear Making - #3

Draw the Sewing Line 
We're only at lesson 3, and I've said it a few times;  while making tiny bears, accuracy is everything. 
When I look over a bear to see whether it was neatly made, one of the first things that I check are the paws and footpads.  Whenever things come in pairs, they should match.  It is the mark of an accomplished bear maker that they sew and stuff the paws and feet of their bear so that they have the same shape and symmetry, and form a matching pair.
These bears' identity is protected ;-) 
See what I mean about the footpads?  Once you've noticed, it will not stop bothering you.
Stuffing has a role to play, but before we get to that it is important to sew the footpads and paws symmetrically into the arms and legs.
In this picture you can see that I marked my pattern cutting lines with a brown pen.  I used a blue air soluble pen to draw in the sewing line on each pattern piece before I cut them out.
When I sew the footpad into the foot, I use the pen line to help me align each stitch perfectly.  You can see my stitches in pink.
I use a small running stitch to sew tiny bears together, also sometimes called stab stitch.  I know that many bear makers prefer to back stitch, but I find that the 'loops' resulting on one side of the work causes seams not to pull tight properly, and often you will see the sewing thread in the seams when you start stuffing the bear.
When I have done one row of stitches around, I go around the footpad a second time, filling in the gaps. I changed to green thread so that you can see the second line of stitches.  When using stab stitch, both sides of the seam look alike. 

A word about threads and pens - in these tutorials you will often see me using coloured threads and dark coloured pens.  This is so that the techniques I am demonstrating will show up in the photos.  When marking pattern pieces on to fabric for real, I like to use gel pens, because they do not bleed or smudge.  They come in many colours.  Always use the lightest colour that still shows up well on the fabric.  This way you will eliminate the risk of pen lines showing through on the right side of the fabric when you stuff the bear.
We will talk more about threads in a future lesson.  Try to use thread that matches the colour of the fabric as closely as possible.

You can draw the sewing line onto all the pattern pieces of the bear if you like, but I don't usually find that necessary.  I do usually sew twice around all my mini bear seams though.
Sewing twice around the seams not only makes them sturdy, it helps with another problem that miniature bear makers often encounter.  Sometimes the seams will appear to be perfectly sewn but once you stuff the bear, the seams become 'scalloped' and look unattractive.  Sewing twice around each pattern piece, making sure to pull the sewing thread tight as I go along, I have managed to eliminate this problem completely when making small bears.
This is my book page for lesson 3.

In this miniature bear making series, we are using the Angus pattern, which you will find in my Etsy Shop, and on the Tin Soldiers Website.
I have made a few page templates if you would like to copy mine, but it could also be fun to make your own.  Every week, you will find printable templates for Project 52 HERE .

Liezel shared her book cover with us.  She is a teddy bear designer, computer and music teacher, and mother of three girls.   Her homework is always done.  In the studio we call her the Head Girl.  You will find Liezel's designs in her Etsy Shop, and at Bresbears on the Tin Soldiers Website. 


Good morning everyone.  I'm back on track.  After taking time out to sort out a family crisis, I have managed to catch up with emails and blog posts over the last few days.  The fact that the man is attending a seminar in a neighbouring town and needs to depart at the crack of dawn has also helped.  I've been getting up two hours earlier than usual.

So, Project 52 lesson 3 in a few minutes, and more to come this week!

Also, don't forget that we have a polymer clay Easter bunny workshop this coming Saturday.  A few seats still available if you would like to join us.

Wishing you a creative week.


Tuesday, March 18, 2014

Project 52 - Miniature Bear Making - #2

Always Reverse the Template

When making a tiny bear, it's easy to imagine that the footpads, ears, etcetera have a symmetrical shape and that you don't need to flip the templates to cut the reverse pattern pieces.  Not true!  
The smaller the bear is, the more important accuracy becomes.  On a big bear you wouldn't even notice a one millimeter deviation. On a tiny bear template it makes a big difference.

Here I am showing the templates in yellow, and reverses in blue. 

Do you see how I reversed the templates to use up a square of fabric for the layout?
Most people would have done two paws with two footpads underneath.
 Or this. All the pieces in a line.
 Laying out the pattern pieces in a square will allow the most economical use of fabric.  Not that we aren't already working with tiny pieces of fabric here, but the hoarder in me wants to save every scrap :-)

This is my book page for week two.
And here's a peek at my latest Angus.  He's already making friends with some of the unusual characters who live in the studio.
Once I started, I could not resist finishing the teddy bear.  I made him from Loubear's fabric Lisa colour 5.  The mohair has a 3.5mm pile and is crushed, ideal for a slightly worn look in small teddies.
That's it for today, dear teddy bear makers.  Another mini bear technique coming this Thursday.

In this miniature bear making series, we are using the Angus pattern, which you will find in my Etsy Shop, and on the Tin Soldiers Website.
I have made a few page templates if you would like to copy mine, but it could also be fun to make your own.  Every week, you will find printable templates for Project 52 HERE .

What is your favourite fabric for making mini bear footpads?  I would love to hear from you!  Leave a comment on this post.


Monday, March 17, 2014

Show and tell - Marjorie's cloth dolls

A few months ago I sent doll patterns by mail to Marjorie in Australia.  This week I received an email with photos of two dolls that she made using Nerina's patterns.  I love the way that internet has opened the world to crafters.  For me it's inspiring to see where the patterns went, and what was made from them. 

 This is Pockets
And this sweet girl is Meggie.

Marjorie is making and donating dolls dolls to a children's hospital.  Well done, Marjorie!  Your dolls are beautiful. 

Newsflash - Polymer Clay Easter Bunny Workshop, and Panda Progress

Good Monday morning everyone.  Wishing you a productive, creative week!
Here's a quick note to let you know that the proposed Easter Bunny Polymer Clay Workshop on 29 March has been confirmed.

Here are the bare bones details:
What:  A polymer clay Easter bunny.  Jointed or unjointed, your choice.  Easter eggs from clay if you want to.
When: Saturday 29 March.  Morning 9am to 12, OR afternoon 1 to 4pm.
How: Adults, beginners to advanced.  Sorry, no children.
Cost: R 60 per session, no clay included.  Bring your own clay, buy clay at the studio, or ask Megan to prepare a clay kit for you, additional cost R 100.  There are no workshop notes, you are welcome to make notes in class, and photograph the steps of the project as we go along.
The class will be limited to 8 persons.  There is a morning and and afternoon session, but you need to book as soon as possible to ensure your place. If you want to stay all day, book for both sessions and pack your own lunch.  Teatime treats served all day.

There is no workshop sample to show yet.  I've been thinking about this project, and some time in the night inspiration struck.  When I woke up this morning I knew exactly what we will be making.  As time allows this week, I will make and photograph samples.

Panda Progress
Fabric arrived on Friday afternoon, yippee!  I have not finished digitizing the pattern and writing workshop instructions yet, that is my main priority this week.  Homework kits for the workhsop should be ready on Thursday.

Thursday, March 13, 2014

Project 52 - Miniature Bear Making - #1

Make a Stencil For Small Parts

Let's start with something small.  Templates.  Or big and fat.  Fingers!
If you have ever traced templates for a miniature bear on to fabric, you will know how difficult it is to hold those tiny pieces down and trace around them.  Especially the paw pads and the ears.  Once you are halfway around the template, you have to move your finger so you can trace around the other side, then the template slips and you lose your position on the fabric.  And for good measure, you draw some lines on your finger instead of on the fabric with permanent marker.  Oh, the aggravation.

Here's a simple solution. 
Instead of making templates for very tiny pieces, make a stencil.  Much easier to position on the fabric, and you can hold down the edges while you are tracing.
Tip:  Using a template, you are tracing around the outside of the template line.  Using a stencil, you will be tracing on the inside.  When I cut out a stencil, I cut outside the template line, so that the stencil will be just the right size when I use it to mark out on the fabric.
With miniature bears, accuracy is everything.  It is important to have a sturdy template.  Thin card is fine for a set of templates that you will use only once or twice.  Template plastic is much sturdier.  I use old x-rays that have been cleaned with bleach and hot water.  

Here's something interesting I came across in Debbie Kesling's book How to Make Enchanting Miniature Bears.  She uses rubber stamps to transfer pattern templates on to the fabric.  This is a good idea if you are going to use the same set of templates many times - having a rubber stamp made can be costly.  This technique also presumes that you will always have a piece of fabric that is square.  When making miniature bears, I often use scraps, and need to fit the pieces in according to the shape of the fabric.

This is my book page for week one.

In this miniature bear making series, we are using the Angus pattern, which you will find in my Etsy Shop, and on the Tin Soldiers Website.
I have made a few page templates if you would like to copy mine, but it could also be fun to make your own.  Every week, you will find printable templates for Project 52 HERE .

Looking into the future, next week we are going to spend more time on making perfect footpads and paw pads.  The week after, we are going to make a pair of spectacles.  If you have a bit of time and a scrap of mini bear fabric, make a head for Angus so that you can custom fit his eyewear.  You don't need to make the rest of the limbs if you don't want to.  Over the next months we are going to make Angus into an Easter bunny, a clown, a panda... you can always use the head with one of the  body options in a future lesson!

Have a question about miniature bears?  I would love to hear from you!  Leave a comment on this post.

Tuesday, March 11, 2014

Project 52 - Miniature Bear Making - On your marks... Get Set... Go!

In my previous post, I explained what the goals are for Project 52 - Miniature Bear, and more or less how I intend to put it together.
So, I got out my playing cards and sat staring at them for a day or two.  Getting started is the hardest part.  Especially if you commit to something that you will be doing for a whole fifty two weeks.
In this post I'm showing in detail how I put my book together.  Hopefully this gives you some ideas for your own book. 

Remember, you don't have to make a book.  If you want to do something different like flash cards, or just follow the lessons and not mess with paper at all, that's fine too.
If you are making a book, I would love to see photos of your work once you have done a few pages.  You can email me at megbear99@gmail.com, and I will add them to the blog.

Mark the centre of a card.  This will be the template for making holes in all the cards.  I punched holes halfway between the centre mark and the top and bottom edge.  The holes are 5mm from the outside edge of the card.  If you are going to use playing cards and the templates I provide, the position of the holes should be in more or less the same place as mine.  My pack of cards are standard size 2 1/2 inches by 3 1/2 inches. (See previous post and Artist Trading Cards to find out why this size is significant).

Use the template card to make holes in the same place in all the cards.
Originally I was going to use book rings to bind my book.  Then I discovered a bit of ball chain lying around and liked that better.  You can find book rings at stationers and scrap booking shops.  You can buy ball chain and fasteners at a bead shop or hardware store.  I think other kinds of chain could work well too.  So would a pretty ribbon or braid.
Whatever fastening method you choose, make sure that you give it lots of play.  As we stick paper to the cards they will bulk up and your book will become thicker.  At this point I'm not going to make covers for the book.  Let's leave that until we've made a few interesting inside pages.
Now we come to the fun part, making the pages!
My cards came with plasticized coating, no doubt useful to resist whiskey spills durning a poker game, but it is no good if you want to paint the cards.  I prefer a worn grungy look.  The cards can be lightly sanded with fine (220 grit) sand paper, or even an emery board.

To add to the grungy look, I painted the edges of each card with brown acrylic paint.
Wait a minute, then wipe with a dry cloth.
Now I am ready to start pasting lessons on to the cards.
You might need to repunch the holes.
This is more or less what the pages of my book are going to look like.

If you have a photo editing program and are creative, you can design your own.  It would also be fun to draw and paint each card by hand.
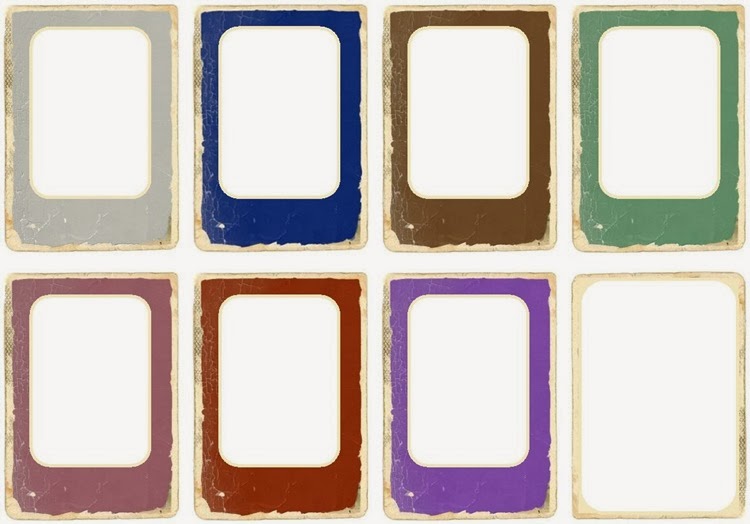
Alternatively, I've made a template of my pages with various colours for the background.
http://www.tinsoldiers.co.za/Workshops/52Minibear/Project52.html
I turned it into a PDF file so that it will print to scale.  You can download the file HERE.

That's it for today, dear teddy bear makers.  Lesson 1 available later this week!


Monday, March 10, 2014

Monday, Monday

Good morning everyone!
It is raining and raining and raining here.  The roof still leaks a steady stream and I've given up trying to get laundry dry and floors mud free. 
Fortunately I'm not the kind of person who wrecks my nerves over housework.  When the rain stops for a few minutes, instead of pushing a broom, I grab the camera and hunt mushrooms.  Some really weird and wonderful specimens are popping up all over the garden.  If only I could find my mushroom field guide, I could name them.  Isn't this one stunning?

This week in the studio:
  • Panda is back on my work table and I am making feet and claws.  If you are interested in doing a workshop to make the bear, contact me.  Dates are 5 April and 3 May and I will have fabric and patterns ready soon.  
  • I am working on Project 52.  Two posts planned for this week.
  • Mini bear kits and fabric arrived from America at last.  I am still busy unpacking, if you were waiting for something in this shipment I will contact you soon.  If you are a mini bear maker and want to get in there first, let me know and I will tell you what's available.


Monday, March 3, 2014

Project 52 - Miniature Bear Making - Let's get started!

I promised miniature bear makers that we could do a whole year of techniques specially for miniature bears, and play with mini bear patterns and mini bear accessories.

There are several reasons why I am eager to commit to this ambitious project.

I love miniature bears!

A project 52 is just the thing when you are stuck for creative inspiration and need a kick start.  If you Google Project 52 you will see how thousands of artists are using this technique to help grow their creativity.  Noah Scalin wrote a book about his even more ambitious Project 365... I bought the book, but whenever I think of starting something that big, I need to go and lie down for a while... maybe next year.

http://www.52reasonsiloveyou.com/
Some time ago I came across 52 Reasons I Love You.  Now I don't have a romantic hair on my head, never mind 52, but this project blew my mind because of the format in which it is presented.  There are 52 weeks in a year, and 52 playing cards in a deck.  Playing cards are the exact size (2 1/2 inches x 3 1/2 inches) of Artist Trading Cards, which is another of my hobbies.  Sudenly all the dots connected, and I knew that this would be how I present my very own Project 52.

So, this is notice to get ready to get started if you want to join me for 52 weeks of miniature bear making.

In order to participate you will need the pattern for Angus, which you can find on the Tin Soldiers website, or in my Etsy shop.  Once you have the pattern, you will be able to apply the miniature bear making techniques that you find here on the blog.

You will need an assortment of short pile mohair, felt, velvet and cotton fabrics and general bear making supplies.  I'm not going to limit your choices or suggest that you buy stuff specially.  See how far you can get with what you've got.
You will need a deck of playing cards.  Don't use one that you feel sentimental about, or a very expensive pack.  We will be messing it up.  Every week we will add one page (a playing card) to our deck of miniature bear making techniques. After 52 weeks, you can use them as flash cards to remind you of the techniques and store them in a box, or bind them in a book.


I'm looking forward to this year long journey, and I hope that you will join me.